Apple pie, apple crisp, apple sauce, apple chips, and apple butter. All of these dishes have one main ingredient in common: freshly peeled apples!
Peeling a single piece of fruit isn’t a big deal, but when you’re trying to make something like an apple pie that requires a bunch of peeled and sliced apples, peeling them all doesn’t seem that simple.
That’s where the best apple peeler can come in handy and save you time in the kitchen!
An excellent, sharp apple peeler will save you time, bring more consistency to your baking and cooking and help you pack lunch boxes faster. Some apple peelers will go the extra step and work as a corer and slicer while removing the skin too!
So, no matter how you plan on using your freshly peeled apple, knowing how to use an apple peeler is important.
Types of Apple Peelers
When you go shopping for an apple peeler, you’ll find that there are two models available:
Manual Peeler
A handheld peeler requires someone to turn the machine’s handle until the entire apple has gone through the peeler. Thanks to the suction cup base, you can set up this type of apple peeler on any surface.
Automatic Peeler
An electric peeler requires someone to lock the fruit into place but doesn’t need anyone to turn the handle to operate the machine. Instead, an electric motor does the work for you.
How to Use an Apple Peeler
An automatic apple peeler is straightforward to use. You place the apple in place, press the “Start” button, and let the machine do the rest.
A manual apple peeler requires more work and can take some practice to get it right. So, how to use an apple peeler?
Step 1: Attach Apple Peeler to Flat Surface
- Mount the apple peeler to a stable, flat surface.
- If the manual or electric apple peeler comes with a suction cup base, you can clamp it to any flat surface (i.e., countertop) to secure it in place. Place the machine on the counter, then pull the lever to secure the peeler.
Step 2: Pick Your Apple
Here’s the fun part!
- Pick the roundest, plumpest apple in your batch.
- Make sure that the apple is free of any imperfections. The machine will still work if there are some imperfections, but it won’t be as great of a peel.
Step 3: Figure Out if You Want to Core the Apple
- Most manual apple peelers come with an adjustable coring arm. If you’re slicing apples and want to core the apple, too, pull the arm into the “up” position.
- Tighten the screw on the adjusting arm to hold the coring arm in the upright position.
Step 4: Place Apple on Prongs
- The lever located on the other side of the coring arm has three sharp prongs on its head. This is where you put your apple.
Step 5: Turn the Lever
- Now you want to start turning the lever so that the apple starts moving toward the coring The peeling blade should be next to the coring circle; how close this blade is to the circle will determine how much skin will be removed.
- While turning the lever, make sure that the peeler isn’t cutting too deep into the apple that you lose actual fruit, but not so thin that you still have skin on the fruit.
Step 6: Remove the Cut Apple
- After your apple has been cut, remove the spiral cut, cored apple from the machine.
- Remove the core from the prongs and discard.
- Pull back the peeling arm to the starting position.
- Prepare the next apple!
Can I Use My Apple Peeler for Potatoes?
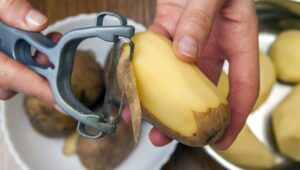
Now that you know how to use an apple peeler, you’re probably wondering if you can use that magical contraption to peel potatoes. Well, it turns out that you can use it for potatoes and other fruits and vegetables as well. Remember that you can’t peel garlic using an apple peeler; you need the best garlic peeler for that!
Because you don’t need to core potatoes, you should put the adjustable coring circle in the downward position. But other than that, the rest of the steps are the same as we put them above.
Peeling Hacks for Apples
- Before peeling your apples, make sure that you have a wide enough working area because apples make a mess with all of their juices.
- Ensure that you place the stems facing the prongs when you place the apple on the peeler.
- When turning the handle, keep one hand on the base of the apple peeler to ensure that it stays secure during the peeling process.
- When turning the lever to peel the apple, don’t go too fast or too slow. Going too fast will only make it so the blade won’t remove all the skin, but going too slow will allow the blade to cut deep into the fruit. It might take a few tries to find the right speed.
Conclusion
We’ve all heard the saying, “An apple a day keeps the doctors away.”
But with all of the chemicals used on our fruits and vegetables nowadays, eating the skin of an apple might send you to the doctor just as quickly! That’s why it’s a good idea to remove the skin of your apples before consuming them, and the best way to remove the skin from your fruit is by using an apple peeler.
Now that you know how to use an apple peeler, you won’t find the task daunting anymore. Using an apple peeler is so easy that you can even get your kids involved! Now you can bake and cook all of your favorite apple dishes without spending hours peeling apples. All of this can be done by investing in a great apple peeler!


