How to cook chicken breasts to turn this lean white meat into a tender, juicy and flavorful meal that everyone can, and will enjoy!
To cook perfect chicken breasts every time, brine your boneless, skinless breasts in a salt water solution to lock in moisture. Then rinse and thoroughly dry the chicken before coating with a thin layer of oil, salt, and pepper and roasting on a baking sheet in a 450°F oven for about 15 minutes. Finally, check for doneness with an instant-read thermometer or by slicing into the thickest part of the meat and making sure there is no visible pink meat.
Chicken breasts are either adored or abhorred. Some love them for their lean nutritional profile, high protein, and low fat content. Others complain about a lack of flavor, especially compared to succulent dark meat pieces like chicken thighs. However, everyone can learn from a few helpful hints about how to properly cook chicken breasts for healthy, delicious, and moist chicken every time.
The best part about learning how to cook chicken breasts? It only takes 20 minutes to turn raw chicken pieces into a delicious meal. This recipe is perfect for any night of the week, no matter how busy. it’s also a great strategy for anyone who likes to meal prep a healthy, packable lunch for the week ahead. Spend less time in the kitchen and still enjoy tasty, healthy homemade meals with these simple tips.
Chicken Breasts vs Other Cuts
A whole chicken offers many edible parts. Commonly, at the grocery store, you’ll find a selection of poultry that includes wings, thighs, legs, and breasts. In some cases, you’ll see split breasts, which include the breast with a wing attached. And then, of course, there are whole chickens, butterflied and spatchcocked birds, which have been partially broken down for faster cooking.
Each cut has its own special features.
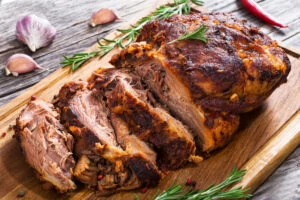
Thighs and wings, as the more stationary parts of the bird, have a higher fat content and less muscle than breasts. these are often referred to as the dark meat. They’re naturally juicy and flavorful.
Chicken breasts, on the other hand, are lower in fat and higher in muscle. They do most of the work while the animal is alive, which can make them somewhat tougher than the more relaxed thighs. With this comes slightly less natural flavor, but a lower fat and calorie content. When it comes to the fat to calorie ratio, it’s hard to beet chicken breasts.
So then the question becomes how to you cook chicken breasts to increase flavor and tender, juicy texture? Luckily, it’s easier than you might think!
Skin on or Off?
There are two common ways that chicken breasts are sold in the states. Either boneless and skinless or bone-in. In fact, boneless, skinless chicken breasts are one of the most popular cuts of meat at the grocery store. They’re a staple in nearly every store, so once you know how to cook them properly, you’ll pretty much always have a safe bet for dinner in your back pocket.
Ingredients for Cooking Simple Chicken Breasts
Once you have a plump, raw chicken breast on hand, you can transform it into a healthy and light meal with a few simple ingredients that are probably already in your kitchen pantry. To make this simple chicken breast recipe, you’ll need:
- 1 boneless, skinless chicken breast
- Olive oil butter*
- Salt and pepper
*You can choose either olive oil or butter to enrich and cook your chicken breasts. Olive oil is a slightly healthier cooking fat choice, with natural omega-3 fats, but butter offers a bit more flavor.
Preparing to cook chicken breasts
Step 1: Preparing the brine
For succulent, super-moist chicken breasts, the secret is to brine your meat. A brine a saltwater solution that often contains other flavorings like peppercorns, sugar, or dried spices. Soaking meat in a brine helps tenderize the muscle fibers and helps the meat lock in moisture.
To make the simplest brine for chicken breasts, fill a pot big enough to hold your chicken with lukewarm water. Stir in a handful of salt. Stir for a good minute until the salt is dissolved. A good ratio of salt to water is 1Tbps of salt for every 2 cups of water. Be sure to add enough water to completely cover the chicken.
Let the brine cool then put it in the refrigerator before adding chicken to it otherwise you may start to cook the meat.
Step 2: Brining
Once the brining pot is ready and the water has properly cooled in the fridge, add the chicken breasts, cover the container and let them sit for at least 20 minutes, preferably a couple hours. The best results is if you can do this overnight if you like.
Step 3: Wash off the salt
After 20 minutes of brining, take the chicken breasts out and give them a good rinse under cold, running water. Hold them under the water for several minutes to remove as much excess saltwater as possible from the surface of the meat. Then gently pat the chicken dry with paper towels.
Step 4: Brush away
The next step is to brush the brined, dried chicken breasts with your cooking fat. A thin layer of either melted butter or olive oil is all you need. Just be sure to coat both sides of the meat. A pastry brush is great for this job, but ff you don’t have a brush, you’ll have to get your hands dirty.
Step 5: Add more flavor to your chicken breasts
If you’re going with a plain recipe, you should salt and pepper to taste.
If you want to walk the extra mile, you can use extra seasoning. There are countless ways to make your own seasoning. A simple one is mixing smoked paprika, garlic powder, salt, and pepper altogether. When you have that ready, evenly season your chicken breasts.
Using salt and pepper alone is great for a first-timer, though!
Oven-Baked Chicken Breasts: Step-by-Step Instructions
Step 1: Get the oven ready
Preheat your oven to 450°F (230°C). If you prefer to cook your chicken at a lower temperature and have a bit more time to spare, you can use a 225°F oven and bake them for 30 minutes. ultimately, there isn’t a significant difference in texture or flavor between the two cooking methods, so we like to opt for the shorter, higher-heat cooking method.
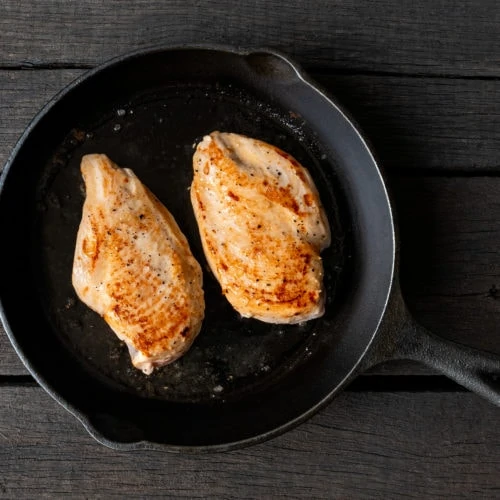
Step 2: Put the chicken breasts in the oven
Once the oven is at 450°F, you’re ready to start cooking! Place the chicken on a flat baking sheet or a small baking dish and stick them in the center of the oven. Check your chicken after 15 minutes in the oven. If it’s not fully cooked, continue cooking and check every 2 minutes or so to avoid over-cooking your chicken breasts.
How do I know if my chicken breasts are done?
To know that your chicken is fully cooked, there are a few different factors to pay attention to. The most accurate and foolproof method is to insert an instant-read thermometer into the thickest part of the chicken. According to the USDA, poultry is considered safe to eat once the meat registers 165°F internally. Ground meat, including ground chicken, is fully cooked at 160°F
If you don’t have an instant-read thermometer, however, you can still accurately check your chicken by using your senses.
- First, touch: gently press the surface of the chicken. It should be firm and have none of the jiggle it had before cooking.
- Second, sight: slice into the thickest part of the chicken. The interior should have no pink or raw color. Another thing to look for is juices in the pan. They run clear when the chicken is fully cooked.
Carryover Cooking
An important phenomenon to keep in mind when cooking anything from meat to vegetables is carryover cooking. This refers to the continued cooking that happens after you remove your product from the heat. For example, if you pull your chicken breasts out of the oven when they measure 160°F, you can let the meat rest on the counter for 5 to 10 minutes, covered with aluminum foil. The chicken temperature will continue to rise by another 5 or more degrees. Of course, it’s still important to measure the final temperature before slicing and serving your chicken for safety. This resting period also helps ensure the juices stay inside the meat, rather than running out over your plate.
Serving Suggestions
These simple chicken breasts pair well with any of your favorite vegetable side dishes. Grains like fluffy quinoa, pasta, or rice are excellent bases to round out your meal. And nearly any sauce, from rich tomato sauce to bright chimichurri, adds flair and flavor to your plate.
Oven-Baked Chicken Breasts
Equipment
- Large bowl
- Baking sheet
- Instant-read thermometer
Ingredients
- 2 boneless, skinless chicken breasts
- 1-2 tbsp olive oil or melted butter
- salt and pepper to taste
Instructions
- Fill a large bowl with water and mix in 2 tablespoons kosher salt until fully dissolved. Add the chicken breasts and place in the fridge to brine for 20 minutes and up to overnight.
- Remove the chicken from the brien and rinse for several minutes under cold water. Pat dry with paper towels.
- Preheat the oven to 450°F.
- Place the chicken breasts on a baking sheet and coat on all sides with olive oil or butter. Sprinkle with salt and pepper.
- Roast for 15-20 minutes, until the internal temperature registers 165°F in the thickest part of the meat. Remove from teh oven and let the chicekn rest for 5-10 mintues, covered with aluminum foil, before slicing and serving.